
Around this time last year I decided I wanted more Christmas decorations. We are always on a budget so I went to my favorite, Pinterest. Nothing like a good DIY project to help increase your holiday decorations. My husband has enjoyed learning how to be handy since meeting me so this was a project I could pull him in to help on.
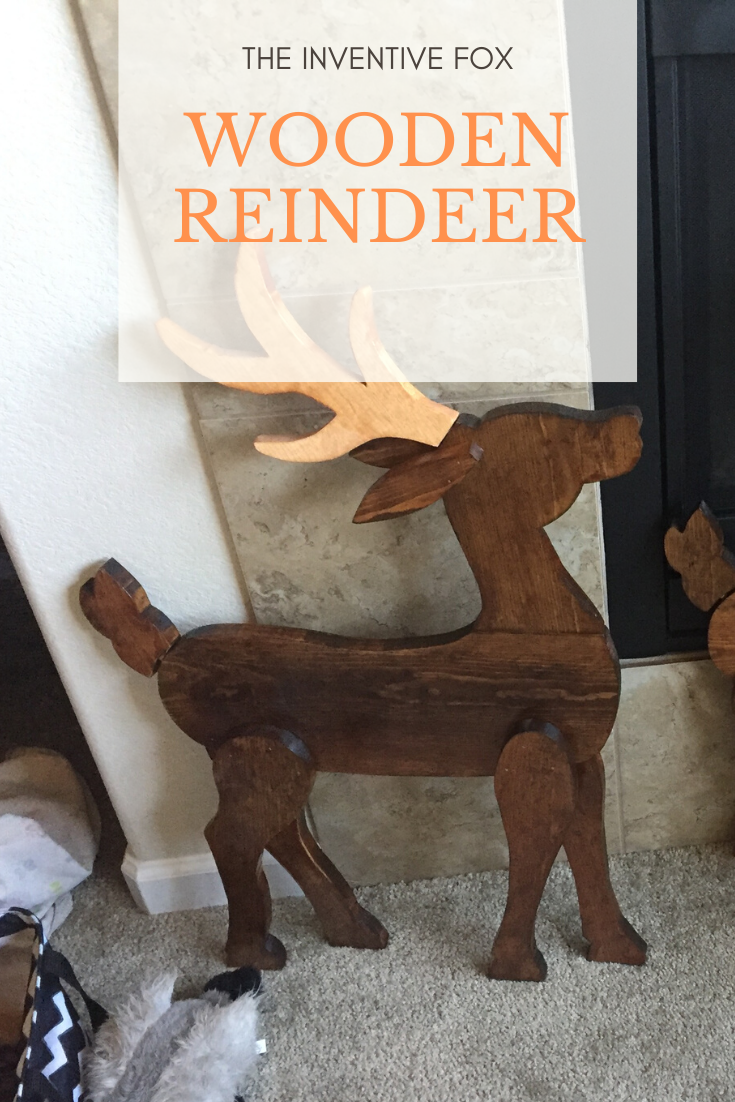
HerToolbelt.com did a 13 Days of Christmas with woodworking plans and the reindeer caught my eye on Pinterest. It is just so cute! So, I decided I needed one, and my college roomie too! She and her husband moved to the area and purchased their first home so of course she needs more holiday decorations too. And the fun began…
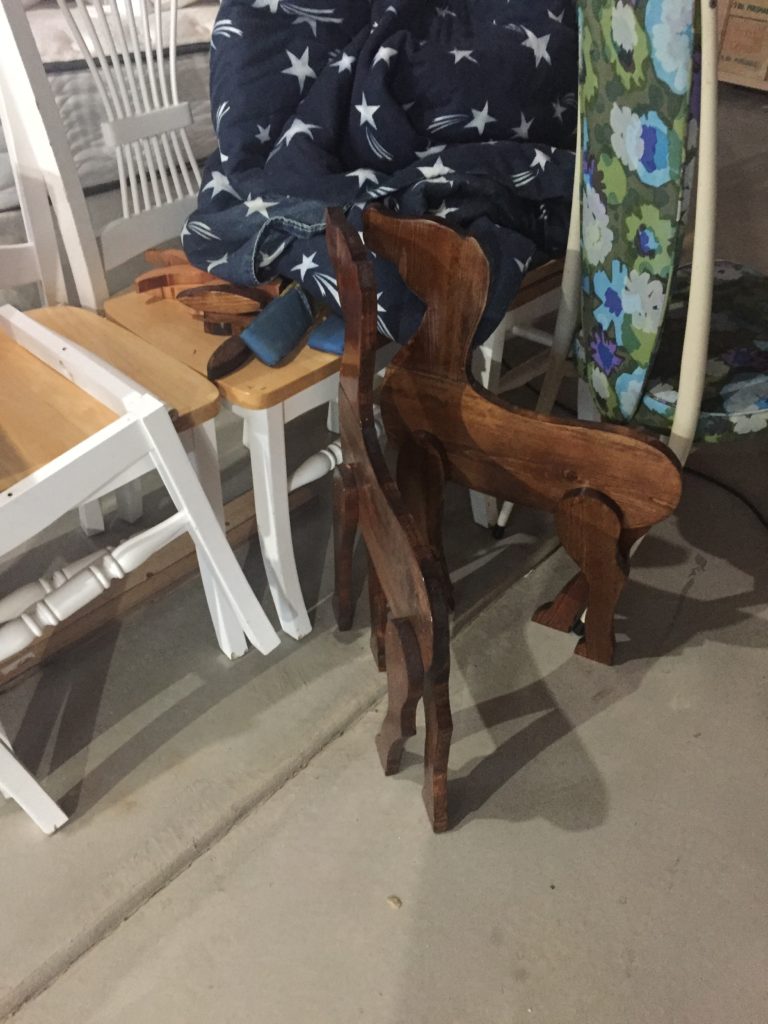
I printed out the stencils. I cut them out carefully. We purchased a couple of boards. I traced the stencils. The hubby cut out the pieces. We stained the pieces. We clear coated the pieces. And…. yeah… They sat for months. Needless to say they were not standing in time for Christmas last year and only found their legs (and heads) this summer.
After organizing the basement a little I decided they must be finished before Thanksgiving this year. College roomie is hosting so it only seems proper to bring her last year’s Christmas gift. I think instead of claiming it took me forever to finish them I may just claim I was storing it for her till this year?
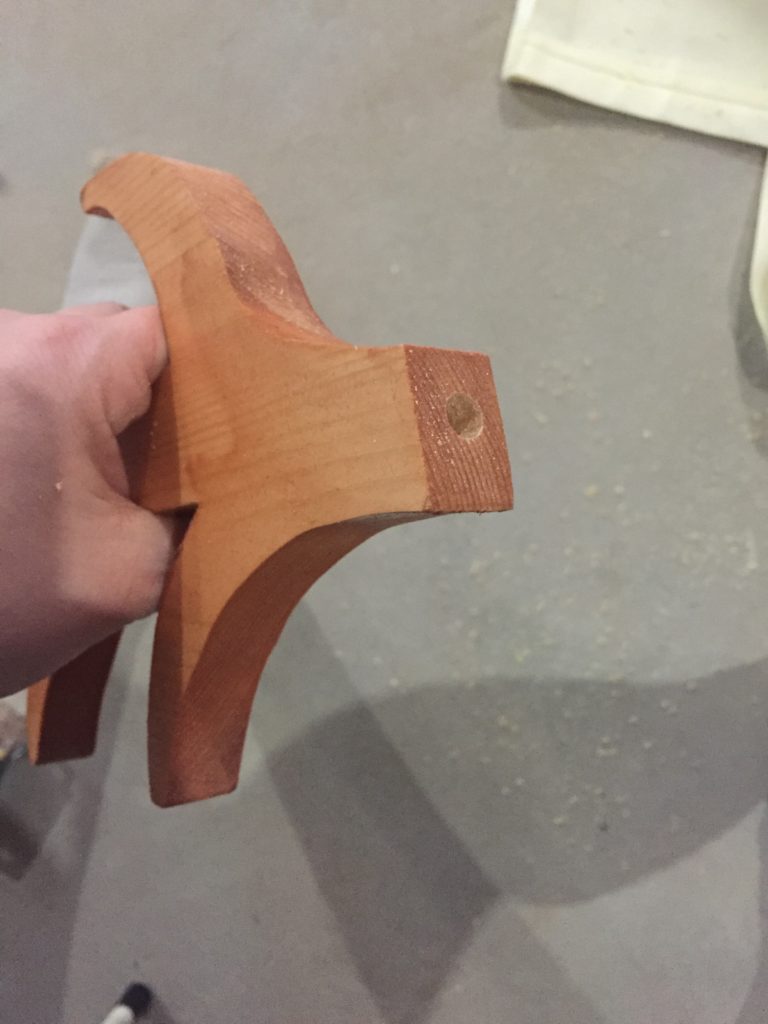
First step was to attach the antlers. I used pegs (like the instructions say) to add them to the deer. Next was the same technique with the tails. It is hard to tell but one set of antlers is slightly off center and the other has a tail that doesn’t set down flush with the deer rear. Finally I used the brad nailer to attach the ears.
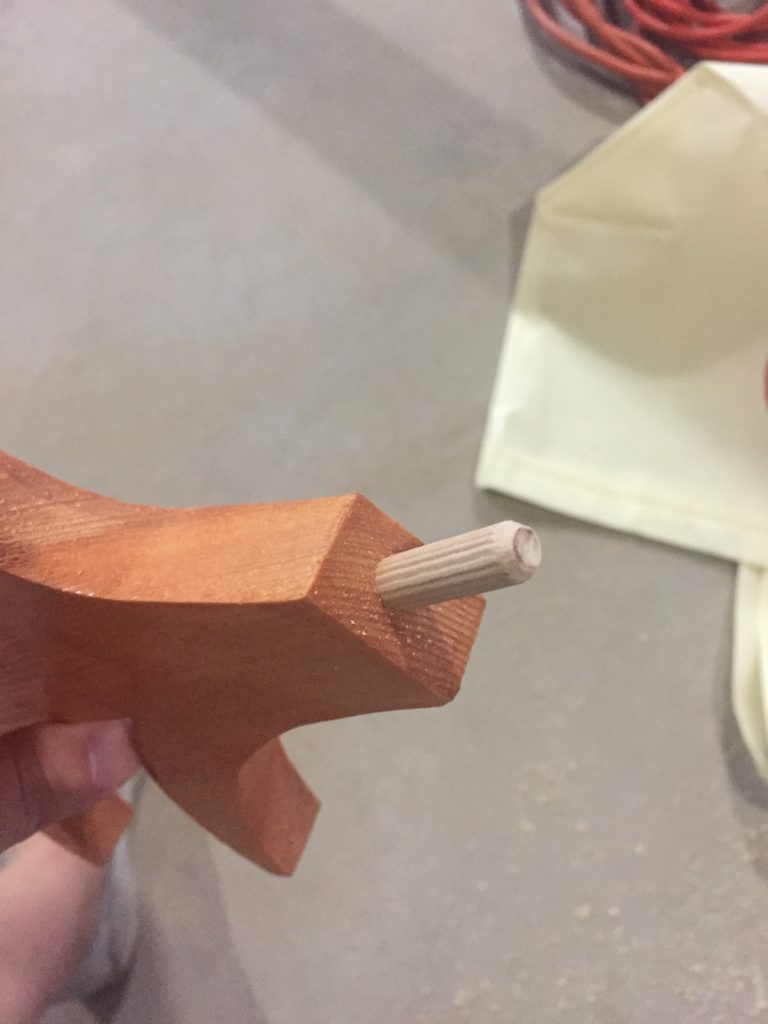
Dowel pin to connect 
Checking the angle 
Antlers attached! 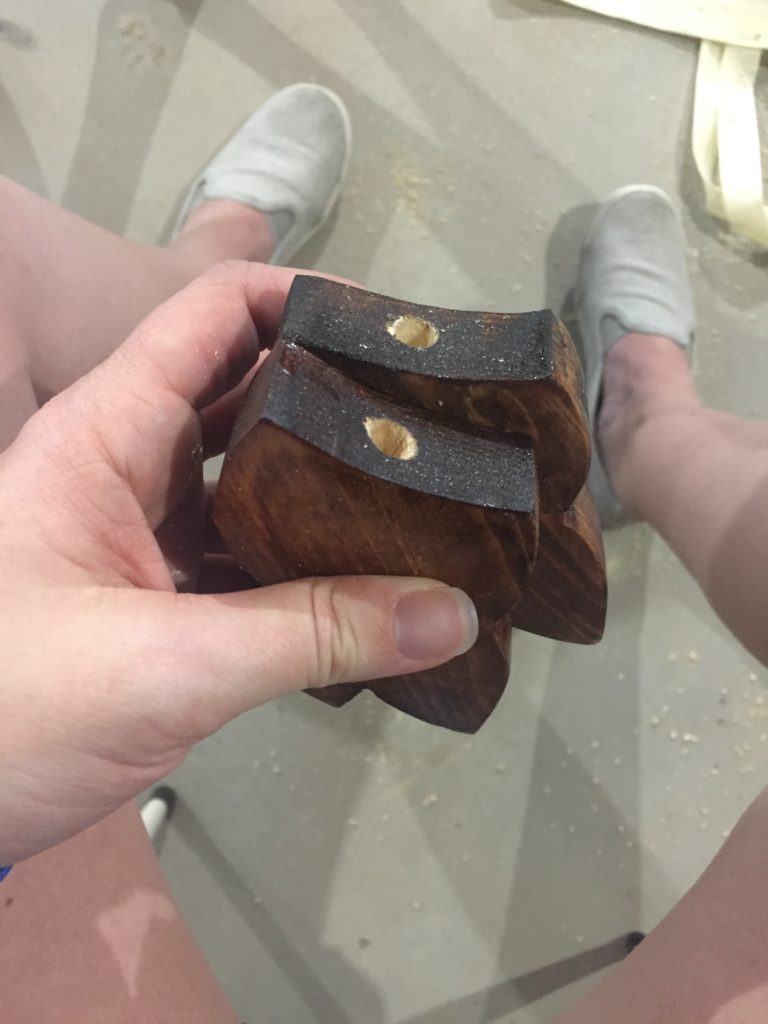
Prepping the tails 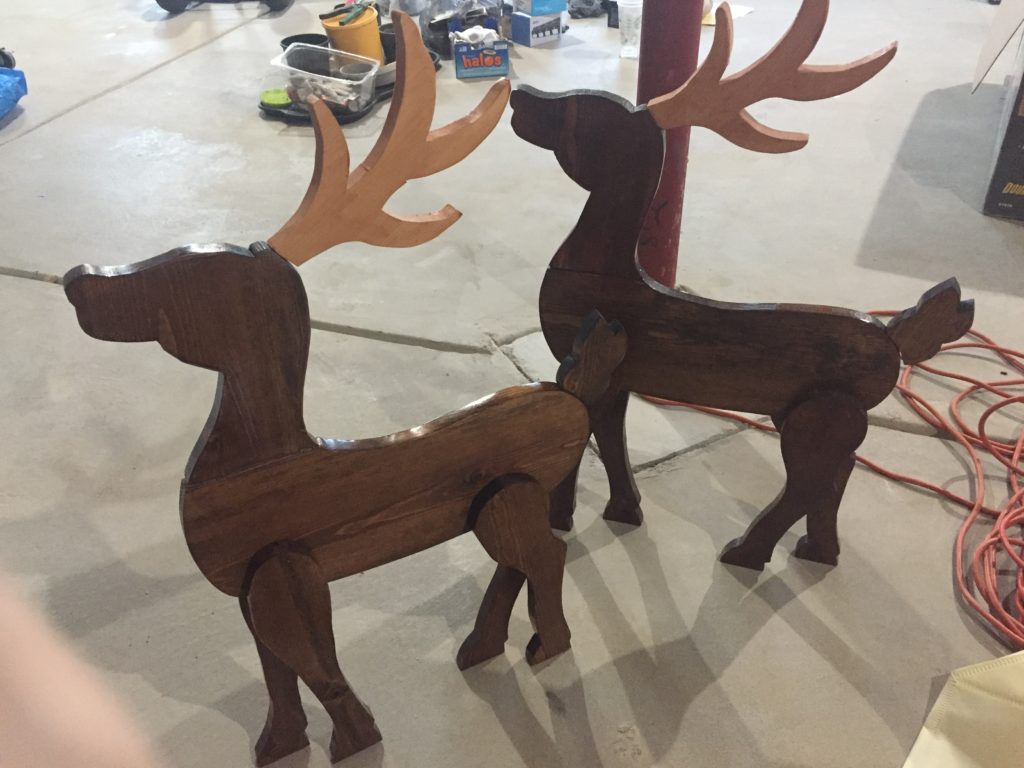
So cute!
Tips if you want to make your own deer:
Assemble before you clear coat. I think it would look more even and smooth if at least the body, head, tail, and antlers were all together. It might also help with all the dripping that happened on the deer.
Pay attention to the instructions. I used brad nails to attach the head to the body and it is a little flimsy. After looking back at the instructions months later I realized it said to use the dowel pegs for that part. Probably would work better… So, when the head falls off I’ll fix it.
Learn to tie a bow. My first attempt at a bow isn’t great and so it isn’t pictured. It is on the list of things to learn.