
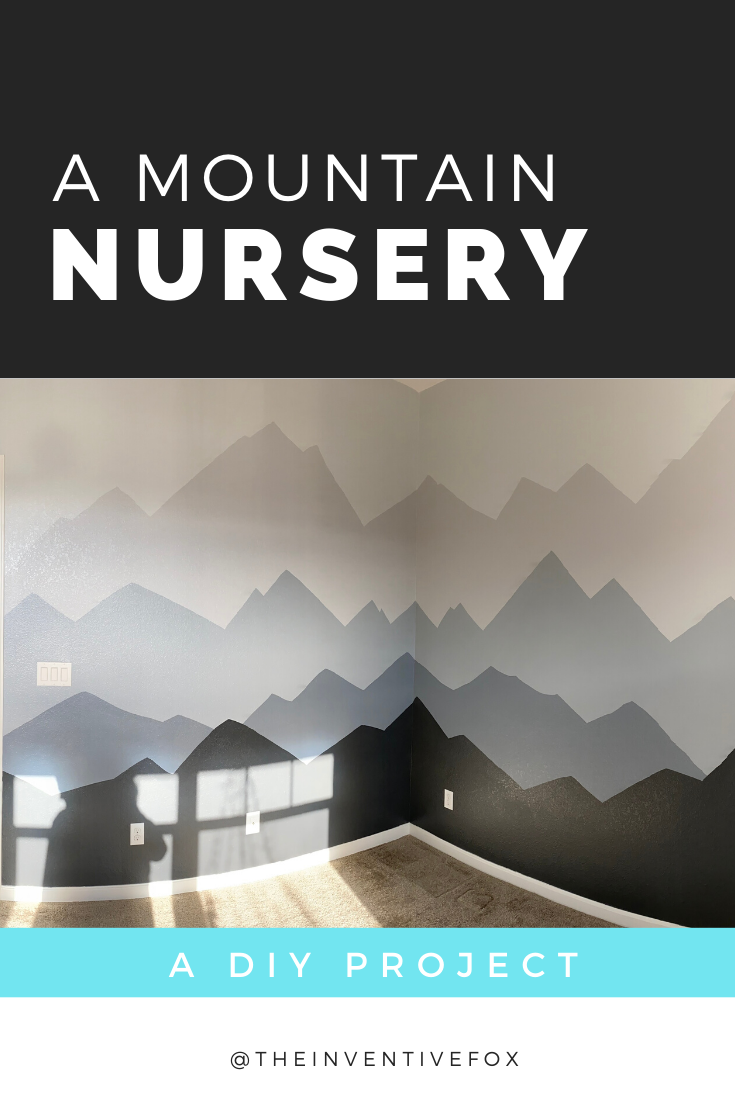
The nursery is painted!!! Yay!!!! Now it is ready for furniture and baby stuff.
The Inspiration
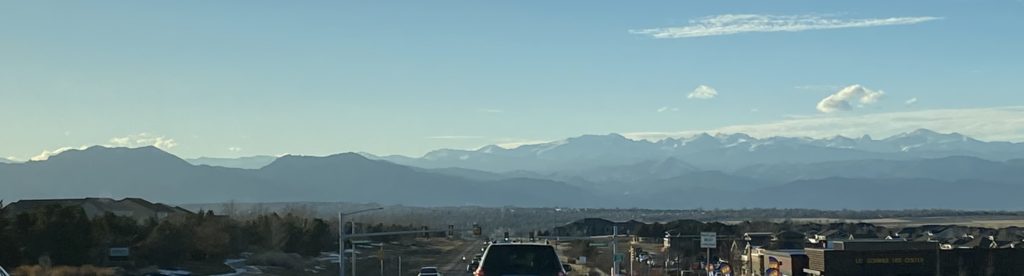
Living on the Front Range of Colorado you can typically see the mountains on a daily basis. Sometimes when you look at the mountains they are beautiful bluish gray shades and just make such a wonderful picture. Especially in the winter when you can see some of the higher peaks covered in white. Seeing the mountains always makes me happy and calm.
Then the good ol’ Pinterest came into play and we found the perfect inspiration! So I read the link and found that they used a projector to create their mountains and trees but that’s about it for an explanation. Requests for color options have gone unanswered and the comments mention it is a peel and stick mural? So… creativity time!
The Plan
First I went the over planned route attempting to come up with an image we could use and project (maybe the library would loan one???) it on the wall to trace. So I decided to try and use a photo of the front range and digitally trace it to create the layers. After using three or four different images and working with the designs I googled some color palettes. Using a few options I found, I colored the digital images to create the layers. Of course I went overboard and after coming up with designs using up to nine colors and it turned into a whole big process… Too big.

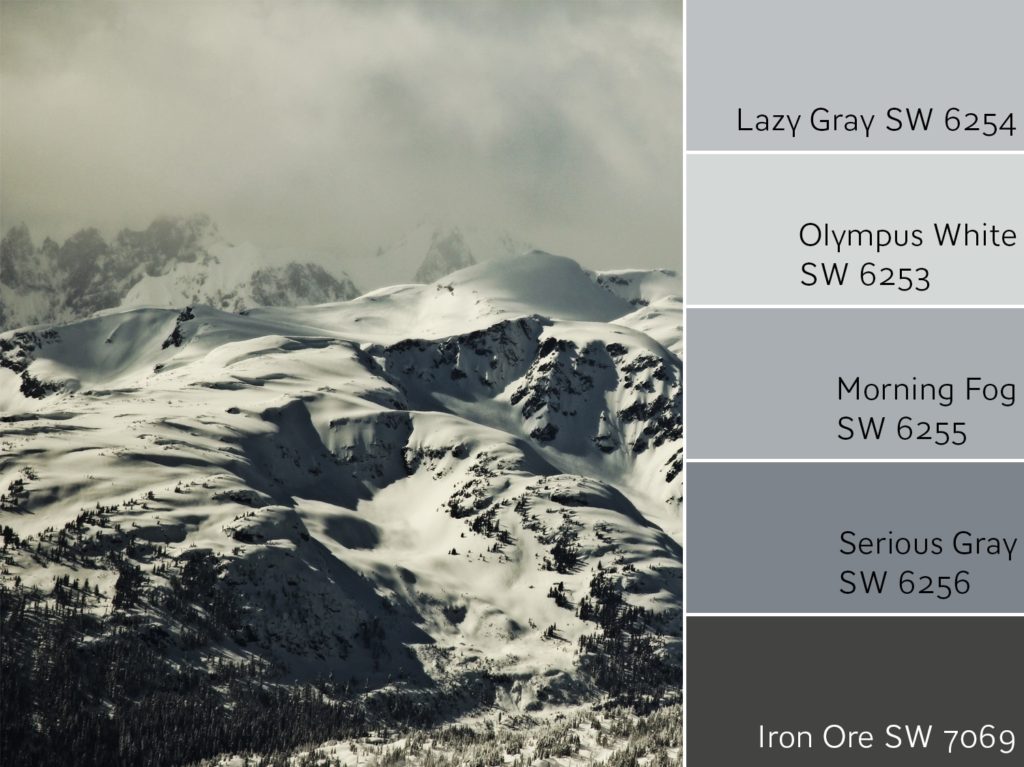
So I backed up and googled a paint palette including a light gray color that I already liked. “Olympus White” was the color I chose for my townhouse bathrooms and when I redid our laundry room this summer it was a great, light, airy, color. I figured we might be able to use the left over paint for one of the colors and a palette came up that (1) included “Olympus White,” (2) was based on a photo of mountains, and (3) only contained five colors. PERFECT!
All of my digital prep allowed me to picture what I wanted on the wall and the hubby wanted more of a “natural” look rather than a sharp, triangular look so I decided to toss all caution to the wind and freehand it! So an old school #2 wooden pencil and I did what most kids get in trouble for and sketched out the walls.
The Process
After purchasing the paint we debated if we should use tape or not to get the mountain edges clean and crisp. Research determined that the best way to get clean, crisp tape lines on a texture wall would require painting the base color, taping, painting along the tape with the base color, then painting with the new color. Or, there is a trick using tape and running a small bead of paintable caulk along the tape edge smoothing out the texture itself. The first method sounded like a lot of work and the second method sounded like the mountain outlines would be a permeant feature until the wall was retextured. I freehanded the pencil lines pretty easily, no reason I couldn’t just use a paintbrush and create a nice line along the edge… So paintbrush it was.
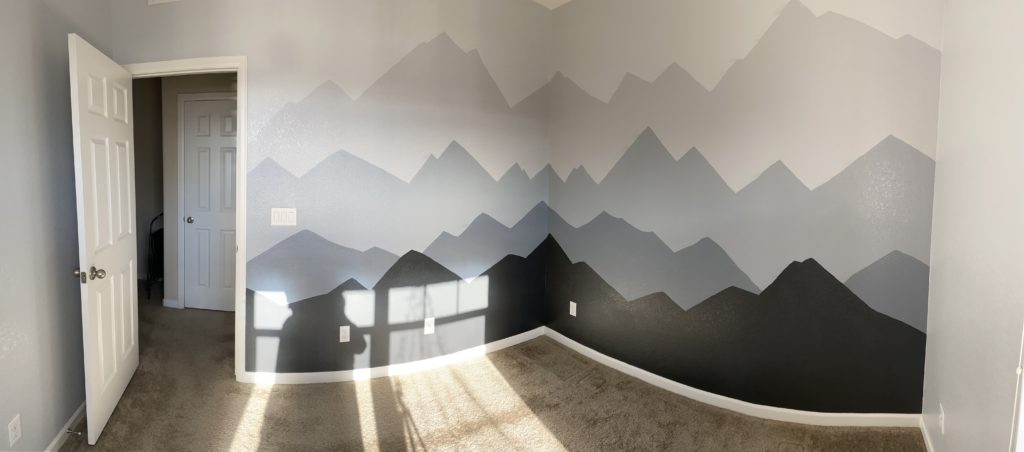
After painting the ceiling white we painted the two non-mountain walls with “Olympus White.” Then, we painted from the ceiling down past the top sketched in line of mountains with the same paint. After that dried, I redrew the top mountains and went along with a brush to create a smooth mountain silhouette. (NOT easy when the colors are close enough that the new color wet is super close to the dry color you’re painting over…) Then using a small roller I rolled “Lazy Gray” down past the next mountain line. Dry. Repeat.

From light to dark we used Olympus White, Lazy Gray, Morning Fog (my townhouse bedroom color!), Serious Gray, and Iron Ore. By the time I got to the Iron Ore layer I was tired of waiting for paint to dry, drawing, outlining, painting, and just went for it without drawing the mountains. If you notice in the video I went about creating the silhouette different on this layer because I just winged it!
The Results
Throughout the process the hubby struggled to see my vision. He didn’t think the grays would match the tan carpet, shades, and the dark wooden blades on the fan. I had faith but it took until the Iron Ore layer went on and the original beige color was completely covered before it really came together. He now loves it as I knew he would. Sometimes you just have to trust the process and wait until the end to judge it.

Up next is furniture. We managed to find a crib for sale in the area for $50 that includes an attached changing table. IKEA had a Poang chair, foot stool, and cushions on clearance. It was probably a display chair but I’ll take it! We have a dresser that needs some sanding and a new paint job along with some drawer repair. We have talked about what to do if we can’t reassemble the drawers or fix them where they actually are solid drawers again. One idea is to turn it into shelves and get some baskets to slide in and out. That will probably be a late spring or summer task so the sanding can be done outside.
Stay tuned for more updates and adventures with a paint sprayer!!! 🙂
P.S. The hubby does not like to be in the pictures or videos I post so although it looks like he didn’t do a lot, he really did. He painted the ceiling (in the room, hall, and bathroom too!), painted most of the Olympus White in the room, and minus the first set of mountains did the second coat on the colors for me. He also spent a lot of time doing paint touch ups in the hallway and painting most of the closet.
Great job! Lucky baby.
Thanks! We are excited!
Awesome post! Keep up the great work! 🙂
Thanks! The room took a lot of work and I wanted to do it justice. Thanks for reading!
I like this post, enjoyed this one best regards for posting.
Thanks! I worked hard on the nursery and the post.
Great info. Lucky me I ran across your website by chance (stumbleupon).
I’ve bookmarked it for later!
Very nice article. I absolutely appreciate this website.
Continue the good work!
If my walls are roughly the same size, how much paint would you suggest getting for each color?
I did a gallon of the Olympus White and we ALMOST had to buy more. Luckily we had some left over from the laundry room but our walls just didn’t want to be covered. The other colors I did a quart of each. One of them I feel I ran pretty low on but don’t remember which one it was. If you’re worried about it, do the line then below it and if you run out/low you can just move the next mountain line up higher.